|
|
|
| Carl Arendt started it all with his
"shoebox" sized layout, Carl's
Imports. After he introduced Shoebox Madness
on his web site, I decided to try laying out a classic Inglenook
Sidings switching puzzle - in a shoebox! Carl's original
"standard international shoebox " is 13" x 5" x
7." He later relaxed the definition, saying that any shoebox
was valid. I did maintain the 13" x 5" dimension for the
footprint, but extended the height to 9" to accommodate my
uncouplers and my tall Dutch buildings.
I had some track, switches, and a piece of paper with a 1" grid on it. I arranged the trackwork and tested the siding capacity using several Egger-Bahn or Roco cars - the smallest HO cars around - and an AHM Plymouth diesel. I found that there are at least five possible track arrangements that will fit in the 13" x 5" space. Photos of the mockups are on the Construction page. For a step-by-step unfolding of the building of this little layout, see the Construction page. A summary of the materials and techniques used is at the bottom of this page. Below are pictures of the completed layout. Some detailed pictures of the shops and their products can be found on the Construction page at this bookmark
|
|
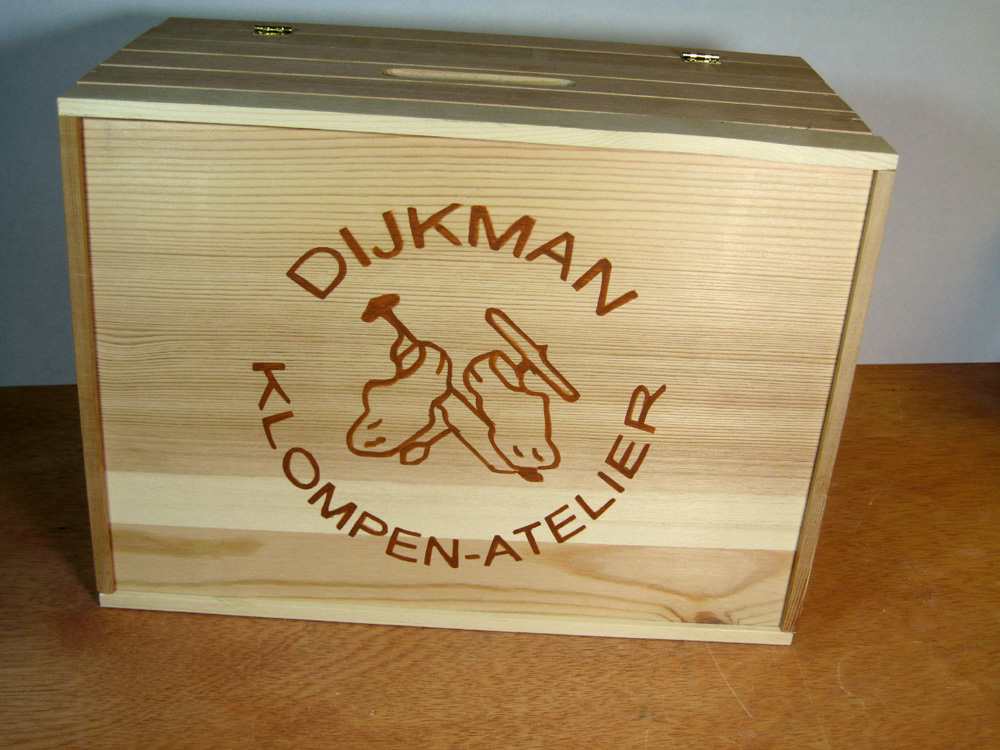
| 6/27/07 Updated picture, now
the logo is stenciled.
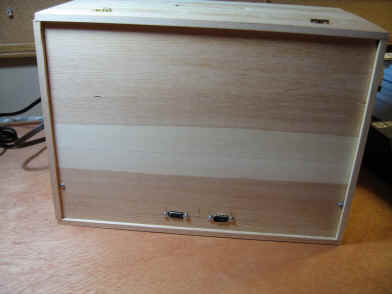
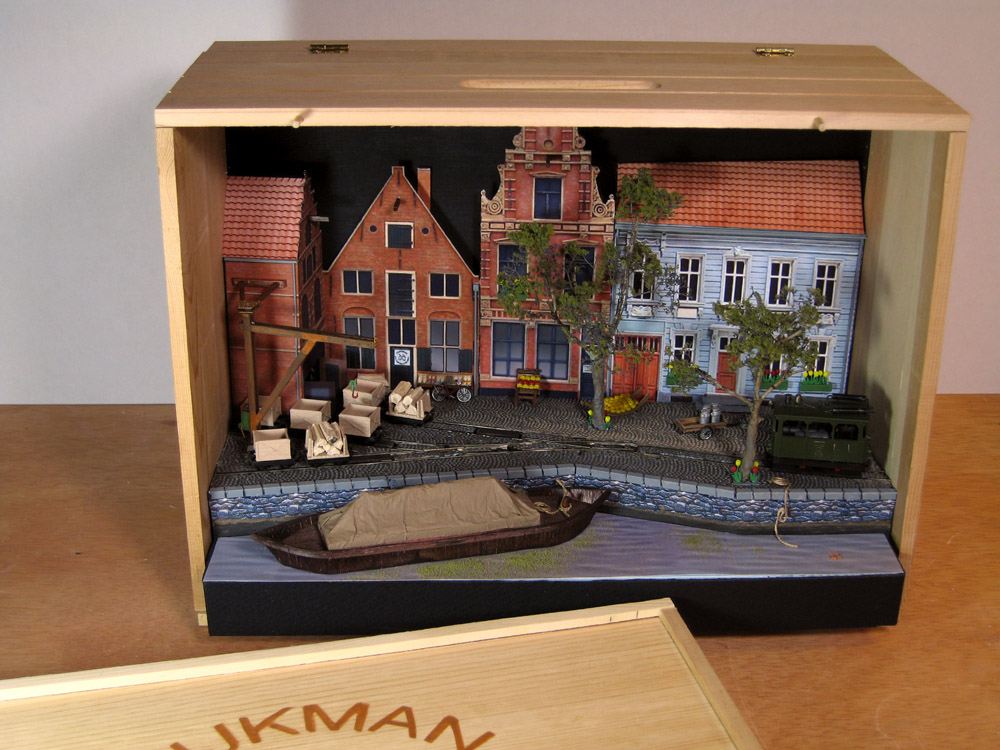
1/14/07 Here's the wooden shoebox with the Dijkman Wooden Shoe Manufacturing logo on it. Inside, you'll find that the Dijkman factory is on the layout, so there's a wooden shoe factory in a wooden shoe box...and yes, I know that wooden shoes don't really come in boxes at all, but I couldn't resist the pun. The back of the box has connectors for power and the turnout/uncoupler controls. The connectors are D-sub nine pin. Below right, the lid is removed and the layout is revealed - a Dutch canal front scene. I thought this view was a little too restricted, so I hinged the top and sides. UPDATE: Canal barge added. |
 |
 |
 |
| The Egger-Bahn Fiery Elias is ready to switch some cars. You can see the superior visibility with the box wings open. | 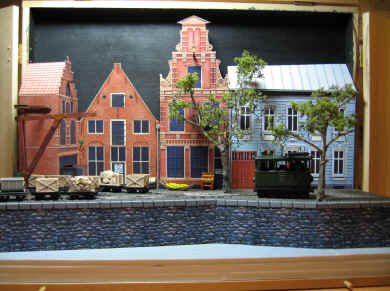 |
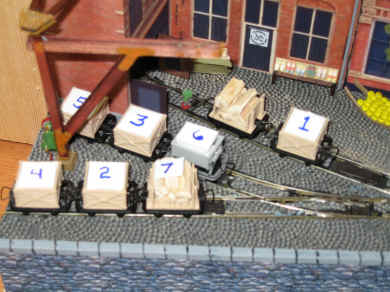
| Numbered loads can be inserted in the cars to play the
Inglenook puzzle.
To play: Randomly draw five numbers and arrange the cars in that order in the fewest possible moves. The two front sidings have a 3 car capacity, the rear siding a 5 car capacity, and the headshunt, 3 cars plus the loco. There are 8 cars randomly spotted to begin the game. I use the "tiddlywink computer" system originally defined by Alan Wright - just put eight markers in a shaker, give them a shake, and draw five. These determine the makeup and order of the consist to be created. |
 |
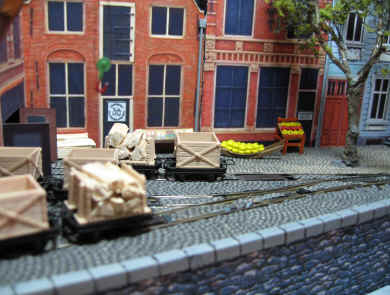
| The wooden shoe factory receives raw wood for its material
and has a display of its finished products beside the door. The
cheese shop (t'kaaswinktje) has a fresh pallet of Gouda and some Gouda
and Edam on display.
The signs are from actual businesses in the Netherlands. |
 |
| If you were wondering about that strange curved pallet of Gouda, here is a picture from the cheese market at Alkmaar showing the prototype. |  |
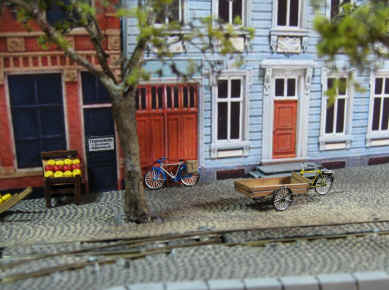
| 03/30/07 There are bicycle bells
on the sound track, so I've added a couple of bikes to justify the
sound. These are HO scale bikes and they are pretty tiny! I
modified one of them into a "bakfiets" or carrier-cycle, going by some pictures of
Dutch scenes I found on the internet. In the view below, you
can see that I've added some milk cans as cargo in the bakfiets.
6/27/07 An updated eye-level view, showing the new canal barge (the tarp is tissue, sprayed with very dilute white glue, the painted) as well as the tulips in window boxes and around the trees |
 |
 |
|
| Building this layout has been an interesting
exercise, both technically and in scenery.
First, I felt that the operation should be totally "hands-off," which meant electric switch machines and uncoupling. Finding switch machines that would not launch these tiny cars into orbit was a real challenge (at least in the USA). Robert Frowenfeld at RJF Trains special ordered the REPA/Uhlenbrock machines for me. They work perfectly and are easily adjusted for just the right amount of lift. The switch machines, on the other hand, are old Atlas tabletop machines that I adapted for under-table operation on a previous layout. They work just fine, although they cannot be relied on to hold the switchpoints securely enough for power distribution - that's done by some relays mounted under the layout. The control panel for the uncouplers and switch machines is on a short cable connected at the back of the layout, and the power supply/throttle is similarly attached. This way, the things I touch during operation do not jostle the layout and derail the cars. Second, I did not want to spend a small fortune on building flats, so I tried getting images from the internet and using Photoshop to correct the perspective and scale them properly, then printed them on matte photo paper. I liked the result so much that printing became the default scenery method, including: stone canal wall, water, wooden shoe display, signs for the businesses, roofs, and the building fronts themselves, of course. Some details were added to the printed buildings to give them more 3D effect: steps, gutters and downspouts, and lift beams at the top of two of the buildings. The Roman Cobblestone paving is an interesting material from Faller. It's foam, about 1/16 inch thick, and cuts easily and cleanly. The track is Shinohara code 60 rail and 150mm radius turnouts held down with double-stick clear tape. The oversized flanges on the Egger-Bahn loco and the Egger-Bahn/Roco cars bounced on the "spike" heads, leading to poor operation. I swapped the wheelsets on the cars for those from MicroTrains trucks and Pat Sanders at Trainworx reduced the flanges on the loco to modern standards. I know, it's an antique collectible Egger-Bahn, but it didn't run very well with those big flanges. Those changes made for very smooth running. Every Dutch canal has trees along the sides. These trees are twigs from a dogwood tree in my front yard. I placed several together to get the right arrangement of branches, then wrapped florist wire around the "trunk," I used some rubbery caulk to cover the wire, then painted it to get the right color. Woodland Scenics "Fine Leaf Foliage" in Light Green forms the leaves and finer branches - a really easy way to make a tree that stands up well to close observation. Thanks to my friend Jeff for teaching me this technique. The power supply is an antique, and I've ordered a CoolerCrawler from TracTronics with the hope of even smoother operation in the future - plus I need it for my can-motored locos. I also want to try adding a sound module to provide some industrial/water sounds and perhaps some locomotive noise, although Firey Elias is a "steam dummy" and presumably would be pretty quiet in operation. UPDATE: See the Sound page for my progress on adding sound to this layout. UPDATE: The CoolerCrawler works very well - much improved low-speed performance. |
|